Plotting the Mohr Circle
To plot a Mohr Circle using Visualizing Stress first click on the menu item labeled File, and then select from the cascading menu items New. A Microsoft Excel-like table should be displayed in the right hand portion of your screen with four columns labeled Sigma1, Sigma3, Theta, and Pore Pressure. You move from cell to cell within the table using your mouse or by hitting the Enter key on your keyboard. Visualizing Stress will allow you to plot as many Mohr circles as you care to, but for now we will plot just one.
Enter into the first row of the table; 40 for Sigma1, 20 for Sigma3, 30 for Theta, and 0 for the Pore Pressure. Click on the menu item labeled Graphics and then Plot Controls. In the No Pore Pressure group put a check mark in the box labeled, Mohr Circle and then click Plot. A Mohr diagram should be displayed in the left hand portion of your screen (Figure 18). To save your entered data, select Save from the File menu. To print the table of data or the Mohr diagram select either Print Table or Print Graph respectively. You can retrieve your saved files by selecting Open from the File menu. In addition, once the saved file has been opened, new data can be entered from the keyboard as with any Microsoft Excel-like file.
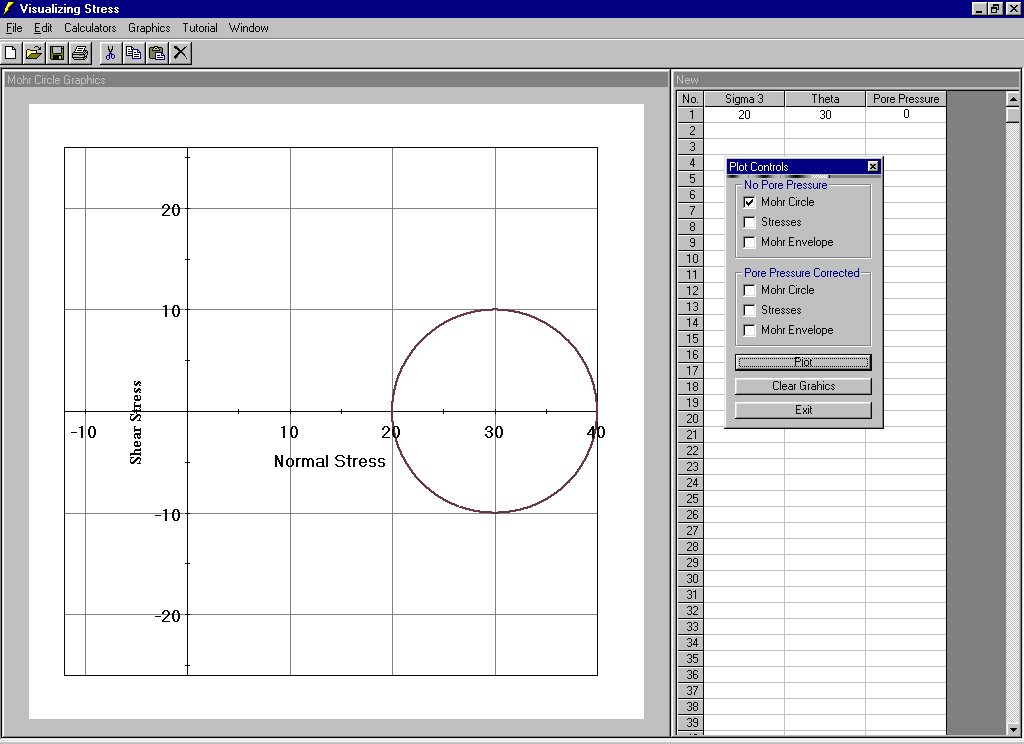
Figure 18. Mohr Circle plotted with Visualizing Stress.